Created: last year
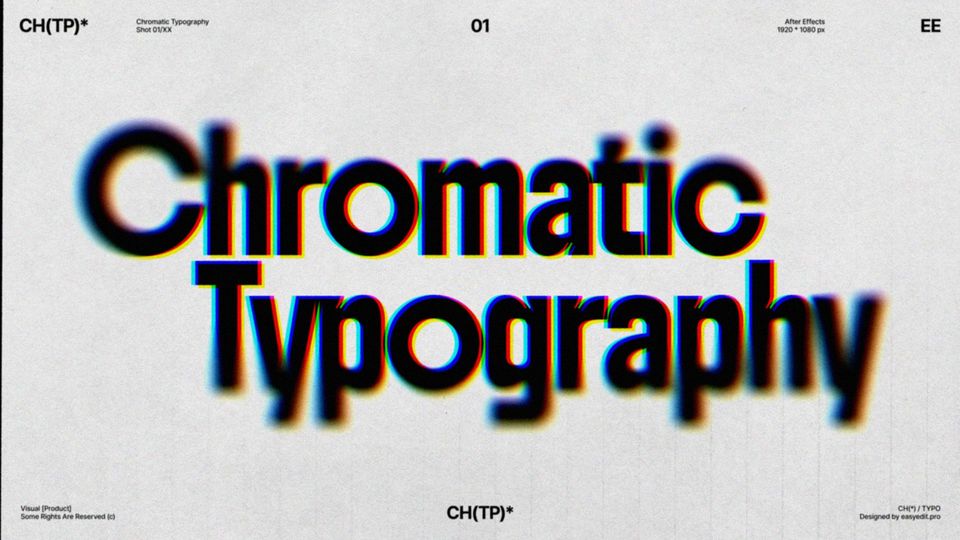
Printed Text Effect Tutorial | Print Text Animation in After Effects
If you want to follow a video tutorial, use this link.
Printed Text Effect and Animation
Create a new composition and call it Text Comp. Create a new text layer and center it.
Let’s create a simple cycle text animation from the start. Add a Wiggly Selector.
Hold Alt and click on the Random Seed parameter. Write down this expression.
We made a simple cycle animation.
Add a Roughen Edges effect to our text layer and set the values as here.
Now, add a Turbulent Displace effect. Switch Displacement to Horizontal and change other parameter values as in the example.
Hold Alt and click on the Evolution parameter. Write down this expression.
Add a Displacement Map effect and leave it as it is for now, we’ll get back to it later. Create a new white Solid and call it a Displacement Map.
Add a Turbulent Noise effect to it. Set the parameter values as we do here.
Hold Alt and click on the Evolution, write down the expression.
Duplicate it once more and change the values in the new duplicate.
Set the Multiply blending mode to this effect, the first effect will remain with the Normal blending mode.
Next, add a Scatter effect to the Displacement Map and change the value to 2.
Get back to our text layer’s Displacement Map effect. Link it to our Solid Displacement Map and select Effects & Masks from the source list. Change the Max Horizontal to 10 and Vertical Displace to 0.
Hold Alt and click on the Max Horizontal Displace, and write down the same expression as we do here.
Link the text layer to the Displacement Map and switch the checkbox to Luma Matte.
Now we need to duplicate the text layer, place the duplicate below it and check a No Matte for it.
Increase its size to be bigger than our original text layer and center it.
Now, move to the effects of the second text layer and change the Turbulent Displace values.
Change the values of Max Horizontal Displace in the Displacement Map effect. Add a Gaussian Blur to the second text layer and change the Blurriness amount to 40.
Go to the first text layer and add a CC Lens effect to it. Change the Size value to 178.
Copy it and paste into the second text layer, changing the value to 135. Hold Alt and click on the Center parameter, write down this expression.
Move to the Size parameter and write down a similar expression but with different Wiggle parameters.
Write down the same expression for the Convergence parameter. Create a black solid and call it Dots. Place it below.
Add a CC Ball Action effect to it and change the values to be as in the video.
Link the Dots to the second text layer with Alpha Matte selected. Create a new Adjustment Layer and add an Invert effect to it, so all the colors below will be inverted.
Add a Displacement Map effect to it and leave it as it is, we’ll get back to it later. Next, we’ll use a TV Noise footage from the Artlist, but you can use any other noise footage. Disable it and in the Displacement Map Layer, link it to the TV Noise.
Set the values as in the example.
Add a Transform effect. Hold Alt and click on the Position parameter. Write down the following expression - it will give us an analog screen wiggle.
Now, add a Posterize Time effect and reduce the Frame Rate to 15.
Add a Noise effect. Change the Amount of Noise to 10% and disable the Use Color Noise.
Create a new white solid layer and call it Bg, place it below other layers. Now we can use the texture footage - ours is from the Cinematic Titles pack.
Place it above the Bg and add an Invert effect to it. Set the blending mode to Multiply.
The footage is shorter than we need it, so we’ll Enable Time Remapping for it and write down the LoopOut expression.
Get back to the first text layer, add a 3D Glasses effect to it and drag it on top of other effects on our layer.
Link it to the first text layer and change the 3D View as in the video.
Change the Scene Convergence value to 2. Change the text overlay to Dissolve. Copy the effect and paste into the second text layer, dragging it over other effects.
Relink it to the second text layer and change the Vertical Alignment value to 2. Change the overlay to Dissolve.
Our bad print effect is ready!
To Sum Up
Now you can create the same effect and experiment to make it different!
If you've enjoyed this tutorial, don't forget to check more guides - here you can check our recent After Effects guides.
You can also watch full tutorial on Youtube.
10k elements for Reels and Stories
Looking to add a splash of creativity to your Instagram stories and reels? You're just a click away! Discover our iOS app infi: packed with 10,000+ unique stickers and design elements to breathe life into your social media content.


